Introduction
Cherry Pie Bars are a delicious twist on classic cherry pie, transforming the nostalgic dessert into easy-to-serve squares. With a buttery crust, a vibrant cherry filling, and a perfectly golden top layer, these bars deliver all the comfort of a homemade pie in a portable, shareable form.
Origin
Cherry pie has deep roots in European and American baking traditions, especially in regions where cherries grow abundantly. Pie bars, however, are a more modern adaptation, becoming popular in mid-20th-century American baking as home cooks looked for simpler, bake-ahead desserts that slice cleanly and feed a crowd.
Cultural Significance
Cherry desserts evoke summertime, family picnics, and holiday gatherings. Cherry Pie Bars continue that legacy—bringing the familiar flavor of cherry pie into potlucks, school events, and festive celebrations. Their ease, beauty, and nostalgic flavor have made them a comforting staple across generations.
Ingredients Quantity
Makes 12–16 bars
Crust and Top Layer
- 1 cup unsalted butter, softened
- 1 ¾ cups granulated sugar
- 4 large eggs
- 1 ½ tsp vanilla extract
- 3 cups all-purpose flour
- 1 ½ tsp baking powder
- ½ tsp salt
Filling
- 1 (21-oz) can cherry pie filling or 2 cups homemade cherry filling
- 1 tsp lemon juice (optional, brightens flavor)
Glaze (optional)
- 1 cup powdered sugar
- 2–3 tbsp milk
- ½ tsp vanilla extract
Optional Additions
- Almond extract for a classic cherry-almond flavor
- Fresh lemon zest for brightness
- Mix of cherry + berry filling
- Sprinkle of coarse sugar on top crust for extra crunch
- A thin layer of cream cheese beneath the filling for richness
Tips for Success
- Make sure the butter is softened—this creates a fluffy, tender crust.
- Spread the bottom crust evenly to ensure clean, even baking.
- For a richer flavor, chill the assembled bars for 15 minutes before baking.
- Allow the bars to cool fully before cutting; this helps the filling set.
- For clean squares, use a sharp knife dipped in hot water between cuts.
Instructions
- Preheat oven to 350°F (175°C). Grease a 9×13-inch baking pan or line with parchment.
- In a mixing bowl, cream the butter and sugar together until light and fluffy.
- Add eggs one at a time, mixing well, then add vanilla.
- In a separate bowl, whisk together flour, baking powder, and salt.
- Gradually add dry ingredients to the wet mixture, mixing until a soft dough forms.
- Spread about ⅔ of the dough into the prepared pan to form the bottom crust.
- Stir lemon juice into the cherry filling, then spread the filling evenly over the crust.
- Drop spoonfuls of the remaining dough on top—no need to cover completely; it will spread as it bakes.
- Bake 35–40 minutes, or until the top is golden and the filling bubbles.
- Cool completely on a rack.
- Optional: whisk glaze ingredients and drizzle over cooled bars before slicing.
Description
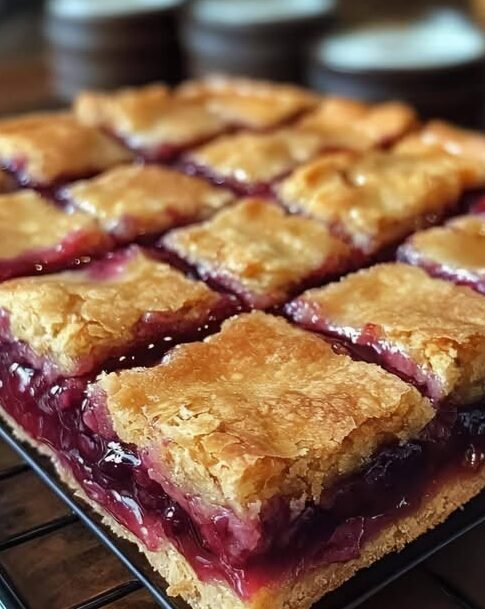
These Cherry Pie Bars feature layers of buttery, tender crust surrounding a jewel-toned cherry filling that is glossy, sweet, and slightly tart. The golden top bakes into soft, rustic patches that give each bar a homemade charm. The texture is a perfect balance of flaky, fruity, and moist.
Nutritional Information (Approx. per bar; based on 16 bars)
- Calories: 230–260
- Fat: 10–12 g
- Carbohydrates: 33–36 g
- Protein: 2–3 g
- Sugar: 20–24 g
Conclusion
Cherry Pie Bars offer all the cozy, nostalgic warmth of classic cherry pie in a simple, slice-and-serve format. They’re perfect for gatherings, gifting, or simply satisfying a sweet craving with minimal fuss.
Recommendation
Try serving these bars slightly warm with a scoop of vanilla ice cream for a dessert-style treat, or enjoy them chilled with coffee for a bright, fruity breakfast pastry.
Embracing Healthful Indulgence
Although delightfully sweet and buttery, Cherry Pie Bars can fit beautifully into a balanced lifestyle when enjoyed mindfully. They remind us that joyful eating includes savoring homemade treats made with care, sharing them with loved ones, and celebrating small indulgences that bring comfort and happiness.